This series is to help you make the most of your cooking day.
Click here to view the entire series.
 To me there is nothing worse than being in the middle of a messy kitchen, bowls everywhere and not being able to find the key ingredient that you need! So, that brings me to step #4- creating a shopping list.
In order to be completely prepared, take all your recipes and make one master shopping list.
- Make sure to account for which recipes you will double/triple.
- Order the list alphabetically, by aisle or according to which store you will shop in for each item.
- Include any containers, tins and/or freezer bags you may need.
Then, before you go shopping cross off any items you already have in your pantry.
One easy way to make a complete shopping list is to use ZipList. It’s especially helpful, if like me, you have most of your recipes online.
Creating an account is free and you can add any recipe you see online. You can easily use the ZipList Web Recipe Clipper to add recipes. If you’re using recipes from this here ole site, then you can just press the “save recipe” button. Easy as pie.
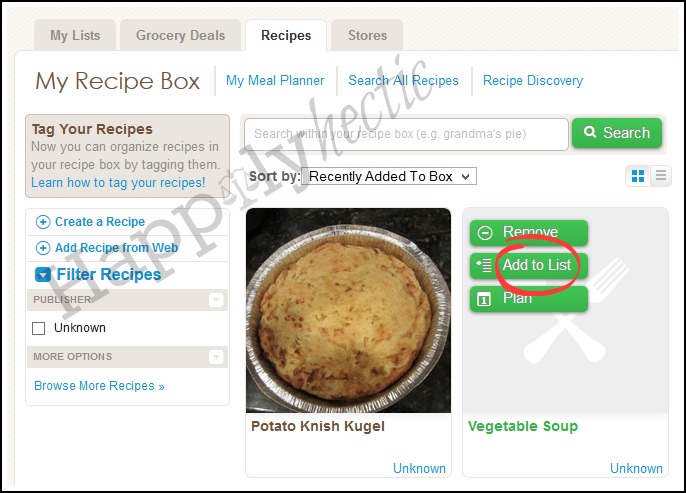
Here’s how it works. In this example, I saved 2 recipes into my recipe box, Potato Knish Kugel and Vegetable Soup.
Hover over each recipe you want to include in your shopping list and click “add to list”
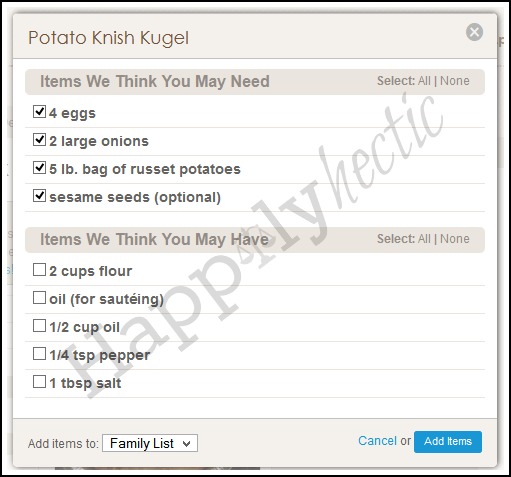
Then check off the items you want to add to your list.
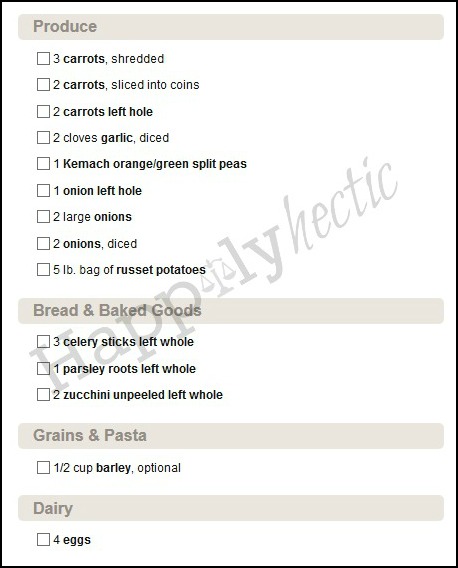
Now you have a shopping list! The one downfall to this list is that if you have two recipes with the same item, it will appear twice in your list.
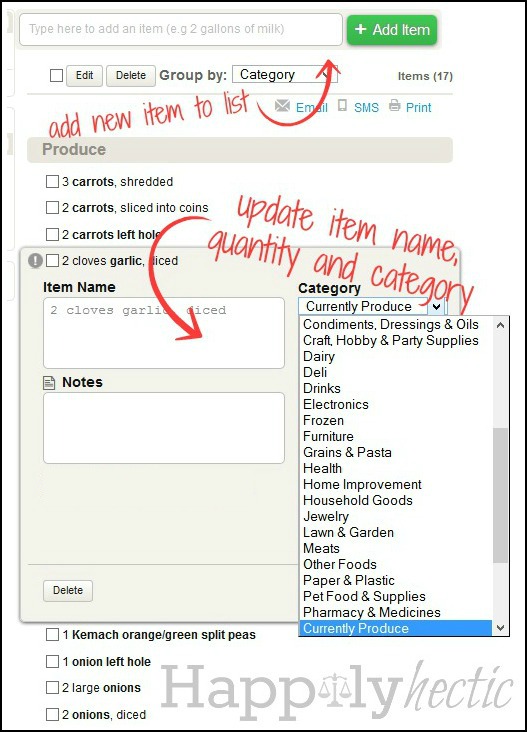
Once you have your shopping list you can edit it. You can add new items, edit categories and quantities or delete items you may already have.
And really, that’s just how easy it is to make a master shopping list! I won’t even begin to tell you how I used to do this before I discovered ZipList…
We’re almost done with this series. Stay tuned for the last step…
Until next time,
Shaindy

